Minggu, 31 Juli 2016


Samsung Galaxy Win I8550 user manual â€" Samsung Galaxy Win I8550 or Samsung Galaxy Win I8552 or also know as Samsung Galaxy Grand Quattro was released on May 2013 and the Android smartphone support with dual SIM. Smasung Galaxy Win I8550 come with great features to support the Android performance such as: 1.2 Ghz quad core processor, enhanced photo taking for 5 megapixel camera and easy mode.


Samsung Galaxy Win I8550 user manual


Samsung Galaxy Win I8550 equipped with specifications and key features such as: 133.3 x 70.7 x 9.7 mm in dimension with 144 g in weight, 4.7 inch TFT capacitive touchscreen display 16 million colors 480 x 800 pixels with multitouch support, microSD up to 32 GB, 8 GB of internal storage, 1 GB of RAM, 5 megapixel rear facing camera with autofocus and LED flash, V GA of front facing camera, Android 4.1.2 Jelly Bean operating system, powered by 1.2 GHz quad core processor Qualcomm MSM8625Q Snapdragon 200 Adreno 203, Li_ion 2000 mAH battery, stand-by time up to 210 hours and talk time up to 11 hours.

Samsung Galaxy Win I8550 user manual is available to download for new owners in pdf and contains of 111 pages to help you with information and setting up for quickly start the device. Samsung Galaxy Win I8550 user manual guide is your first source and its very important to read the manual user before you use the device. The user manual of Samsung Galaxy Win I8550 is free to download from Samsung site here.

Table of contents for Samsung Galaxy Win I8550 user manual:

  • Getting started
  • Basics
  • Communication
  • Web & network
  • Media
  • Applications and media stores
  • Utilities
  • Travel & local
  • Setting
  • Troubleshooting


For new owners of Samsung Galaxy Win I8550, here we give you direct link download of Samsung Galaxy Win I8550 user manual from official Samsung website below:


Download Samsung Galaxy Win I8550 user manual here
Samsung I9230 Galaxy Golden user guide manual - Samsung I9230 Galaxy Golden was released on November 2013 with Dual screen display mode and run Android Android 4.2 Jelly Bean. Samsung I9230 Galaxy Golden offers faster multitasking and browsing on internet also good performance by 1.7 GHz quad core processor. Samsung I9230 Galaxy Golden brings stunning images and rich capture with its 8 megapixel main camera.


Samsung I9230 Galaxy Golden user guide manual

Samsung I9230 Galaxy Golden equipped with specifications and key features: 118 x 59.5 x 15.8 mm (4.65 x 2.34 x 0.62 inches) in dimension with 179 g (6.31 oz) in weight, 3.7 inches Super AMOLED capacitive touchscreen display 16 million colors 480 x 800 pixels screen display with multitouch, 3.5 inches external Super AMOLED capacitive touchscreen display 480 x 800 pixels, microSD up to 64 GB, 16 GB internal storage, 1.5 GB of RAM, 8 megapixel rear facing camera with autofocus and LED flash, 1.9 megapixel front facing camera, run Android 4.2 Jelly Bean operating system, powered by 1.7 GHz quad core Qualcomm MSM8930 Snapdragon 400 processor Adreno 305 and Li-Ion 1820 mAH battery.

Samsung I9230 Galaxy Golden user guide manual available to download in pdf file format with 7.19 MB size and contains of 127 pages. The manual pdf of Samsung I9230 user manual guide will help owner, user and buyer to get more important information regarding to the smartphone key features, specs and some default set up for safety and proper.

Table of contents for Samsung I9230 user guide manual:
  • Getting started
  • Basics
  • Communications
  • Web & network
  • Media
  • Applications & media stores
  • Utilities
  • Travel & local
  • Settings
  • Troubleshooting

Download Samsung I9230 Galaxy Golden user guide manual here

Compare Sony Xperia Tipo Dual vs Acer Z110 - Acer Z110 and Sony Xperia Tipo both present dual operating system Android 4.0 ICS. And for performance, Acer Z110 is powered by MTK 6516 chipset with a 1GHz processor and 512MB of RAM, while the Sony Xperia Tipo dual powered with a Qualcomm chip Cortex A5 MSM7225AA with 800MHz processor and 512MB RAM.

Acer Z110 has a size larger touch screen that measures 3.5 inches with a resolution of 320 x 480 pixels (165ppi). While Sony Xperia Tipo has a dual touch screen measuring 3.2 inches with a resolution of 320 x 480 pixels (180ppi).

Acer Z110 has an internal memory capacity of 4GB, and the Sony Xperia Tipo dual has an internal memory capacity of 3GB. Both come equipped with a microSD slot up to 32GB.
Acer Z110 and Sony Xperia Tipo dual both equipped with a 3 megapixel camera. And unfortunately they are not equipped with a front camera.

For connectivity features both equipped with 3G support HSDPA / HSUPA, WiFi, Bluetooth, GPS, and microUSB port.

Acer Z110 has a cheaper price tag compared to the Sony Xperia Tipo dual. And Acer Z110 offers several advantages such as a larger touch screen and a 1GHz processor.

Acer Z110
Acer Z110 is a smartphone Android 4.0 ICS that comes with touch screen measuring 3.5-inch 320 x 480 pixels. Acer Z110 is powered by a 1GHz processor.
Acer Z110 comes with 4GB of internal memory plus a microSD slot, 512MB RAM, 3 megapixel camera, WiFi, GPS, Bluetooth, and 3G support HSDPA / HSUPA.

Sony Xperia Tipo dual
Sony Xperia Tipo Dual is a smartphone based on Android 4.0 Ice Cream Sandwich which comes with dual SIM GSM + GSM. Sony Xperia Tipo Dual is powered by 800 MHz processor and has a touch screen measuring 3.2 inches with a resolution of 320 x 480 pixels.

Sony Xperia Tipo Dual comes with other features such as 512MB of RAM, 2.9GB of internal memory plus a microSD slot up to 32GB, 3.2 megapixel camera, Wi-Fi, Bluetooth, aGPS, and a battery capacity of 1500mAh.

Cara Flash Samsung Galaxy Fame S6810. work !!!.


Flash Samsung Galaxy Fame S6810. Proses flash di dalam Smartphone android biasa kita kenal dengan proses Install ulang, seperti halnya di dalam sebuah komputer atau PC, Android juga mempunyai hardware yang tertanam di dalamnya, Untuk itu Hardware yang terdapat di dalam Android harus bisa di komunikasikan dengan pemakai atau User melalui sebuah Software, nah software inilah yang mengatur kinerja sebuah smartphone, karena software juga rentan akan rusak sebagai akibat terdelete atau corrupt yang mengakibatkan kinerja Smartphone Android anda melemah. Untuk itu langkah yang paling mujarab untuk mengatasi Samsung Galaxy Fame S6810 Smartphone Android yang sudah lemah adalah melakukan flash atau install ulang. Sehingga setelah anda melakukan flashing pada android anda, anda akan mendapatkan performa seperti Android baru.

Dalam hal ini yang dilakukan fl ash atau Install ulang adalah firmwarenya, karena di dalam firmware ini adalah merupakan letak dari software atau sistem operasi yang menjalankan Android anda. Ok,,, pastinya anda sudah memahami tentang istilah flashing khan ? untuk itu dalam tutorial ini saya akan memberikan sedikit tips cara melakukan flash pada Samsung Galaxy Fame S6810

Ada baiknya jika anda ingin mengenal lebih jauh tentang samsung galaxy fame, berikut ni saya kasih penjelasan singkat tentang produk ini :
flash samsung galaxy fame

Fitur yang dimiliki Samsung Galaxy Fame.

  • Intuitive at every turn. Desain kuat namun sederhana, dengan sistem operasi Android 4.1 Jelly Bean akan mengantisipasi dan mengadaptasi kebiasaan penggunaan pribadi Anda.
  • Memiliki Dual Camera 5MP with LED Flash.
  • Didalamnya juga tertanam Internal Memory 4 GB. 512 MB RAM
  • Dengan layar 3.5" Full Touch Screen. memudahkan anda untuk menavigasi ke semua menu yang ada.
  • Teknologi jaringan berada pada HSDPA, HSUPA (900/2100 MHz)
  • Memiliki Prosesor : Single Core 1 GHz Cortex A9
  • Konektivitas : WiFi 802. 11 b/g/n, WiFi Direct, Bluetooth A2DP,
  • MicroUSB
  • Baterai : Li-Ion 1300 mAh

Kelebihan pada Samsung Galaxy Fame

  • Adanya feature GPS, dng feature ini pemakai dapat tahu koordinatnya dng pas serta real time
  • Memakai sistem operasi teranyar yakni Android Jelly Bean atau V. 4. 1. 2
  • Kamera berkekuatan 5 Mp, dng resolusi maksimum 2592Ñ… ; 1944 pixels, dilengkapi dng feature autofocus, serta lampu LED flash. Mempunyai feature touch focus, face detection
  • Ada feature WIfi, yg tak hanya dapat utk akses internet dapat utk utk sharing koneksi internet dng perangkat lain

Kekurangan Pada Samsung Galaxy Fame

  • Baterai Galaxy Fame berkapasitas 1300mah terma suk kategori boros
  • Kapasitas baterai cuma 1300 mAh dibawah rata-rata, akan tetapi dapat lakukan panggilan sepanjang 8 jam 40 menit utk mode 2G, serta 5 jam 10 menit utk mode 3g
  • Kapasitas ram yg cuma 512 Mb
  • Layar sentuh jenis standard yakni type TFT kapasitif, bukan hanya IPS maupun Amoled
  • Layar yg demikian mungil yakni 3, 5 inci
  • Kamera utama yg dapat lakukan perekaman type VGA Prosesor yg cuma single core
  • Tak ada feature Video Ouput, hingga tdk dapat menampilkan gambar atau video pd layar tv

Apa saja yang harus anda siapkan dalam melakukan Flash pada samsung galaxy fame ini ?


  1. Download firmwarenya disini
  2. Download Odin disini
  3. Download Driver USB disini, jika hp anda tidak ke deteksi ,Download USB driver Versi Terbaru.

Langkah Cara Root Samsung Galaxy Fame

  1. Silahkan anda Install USB Driver ,Setelah selesai install di sarankan reboot Computer anda
  2. Extrak Package Odin Dimana saja. Disarankan dalam satu folder
  3. Turn Off Samsung Galaxy Fame S6810 anda, Hidupkan ke download Mode dengan cara menekan tombol HOME + Volume Down + Power secara bersamaan.

  4. Setelah itu akan muncul Pop-UP peringatan .Tekan tombol volume UP
  5. Hubungkan Samsung Galaxy Fame S6810 anda dengan PC ,Rekomendasi USB ORIGINAL.
  6. tunggu installasi driver selesai (biasanya notifikasi terletak di tray icon ,bawah pojok kanan.
  7. setelah sukses,Buka Odin .pastikan di bagian atas kiri ada ID:COM port HP anda .
  8. jika ada maka berhasil jika tidak, copot USB dan sambungkan lagi ,
  9. jika sudah ke deteck ID:COM portNya ,langsung saja Pilih PDA
  10. Extra Fiemwarenya dan Pilih Firmware Extraka-nya.
  11. tunggu proses Cek SUM md5 selesai
  12. Setelah selesai Klik Start ,dan tunggu proses agak lama ,Di harap Sabar
  13. Ketika selesai  Samsung Galaxy Fame S6810 akan reboot sendiri, dan Jangan di cabut dulu USB.nya.
  14. ketika Di Odin bagian Pojok kiri ada Notifikasi PASS ,maka anda bisa keluar dari odin dengan cara klik exit di bagian bawah kanan. setelah itu cabut USBnya.
  15. Selamat Samsung Galaxy Fame S6810 anda Kembali seperti Awal semula
Demikian cara flash Samsung Galaxy Fame S6810

Sabtu, 30 Juli 2016

Xiaomi the great Chinese Samartphone manufacturer has made its debut in Indian market by releasing its new mobile Mi3 is a superb mobile with great hardware and has many features which are found only in mobiles phones having price more than 30K.

The Xiaomi Mi 3, which is the companys flagship phone, has a Qualcomm Snapdragon 800 8274AB 2.3GHz processor, Adreno 330 450MHz GPU, 2GB LPDDR3 RAM, and eMMC 4.5 flash memory. The Mi 3 has a 5 inch 1920x1080 display with up to 441 ppi. The phone has a 13 megapixel rear camera with dual-flash and a 2 megapixel front camera.


Price In India - Rs. 13,999

The phone is exclusively available on ecommerce site Flipkart.com, and is currently available for only registered users.

Click Here to Buy from Flipkart


Specifications

Qualcomm Snapdragon 800 8274AB
13 Megapixels Main and 2 MP secondary camera
Supports 3G(WCDMA) and 2G(GSM) networks, Wi-Fi Display,Wi-Fi Direct,5GHz Wi-Fi, NFC
3050mAh lithium-ion battery
2 GB RAM, 16 GB Memory
5-inch Full HD 1080p LCD IPS touch display, 1920x1080 FULL HD 441ppi
- Sensors - Gyroscope, Light sensor, Accelerometer, Proximity sensor, Electronic compass, Barometer
- Android 4.3 optimized with MIUI version 5

Click here to download best Games for this mobile

This mobile will be giving a tough competition to Moto G as you will be getting nearly same configurations like Nexus 5 with the price of Moto G. Though people are still worried that it is a Chinese brand and will be of poor quality but remember it has branded hardware. So its up to you to go with it or not. 
SamTeck recommends this mobile over Moto G.

Hard Reset OPPO Find Muse r821.


Hard Reset OPPO find muse r821. Posting kali ini akan saya tuliskan tentang bagaimana cara melakukan Hard Reset pada smartphone OPPO find muse r821, seperti kebanyakan problem yang terjadi pada smartphone, tentang alasan kenapa kita harus melakukan Hard Reset. Misalkan terjadi Bootloop sehingga Smartphone Android anda tidak dapat di hidupkan, atau mungkin lupa terhadap PIN atau Pattern Lock, dan berbagai masalah lainya yang timbul, sehingga kita harus terpaksa melakukan Hard Reset pada Android tersebut.
Hard Reset OPPO find muse r821

Cara Hard Reset OPPO find muse r821.


Sebelum melakukan Hard Reset, apakah anda mengetahui apa itu Hard Reset ? Hard Reset adalah pengembalian sistem Android ke pengaturan awal pabrikan yang mana semua yang ada di Smartphone Android akan kembali seperti baru lagi, termasuk aplikasi, pengaturan, tampilan dan sistem itu sendiri. Tetapi untuk versi OS Firmware tidak kembali ke versi dimana Android itu pertama kali dibeli tetapi kembali ke terakhir kali versi OS Firmaware itu diupdate. Fitur hard reset itu se ndiri akan menghapus semua yang ada di Smartphone Android kita kecuali aplikasi bawaan pabrikan dan pengaturan bawaan pabrikan.

Bagaimana dengan Aplikasi yang anda download, foto, video, atau lagu-lagu ? Kesemuanya itu tidak akan terhapus jika anda menyimpannya di memori eksternal, misal SD Card. Sebaliknya jika kita menyimpannya di memori internal pasti akan terhapus, kecuali gambar bawaan dari Smartphone Android sendiri.

Jika Anda berminat melakukan hard reset, saran yang utama dalah lakukan backup terlebih dahulu data-data penting anda yang tersimpan di dalam Smartphone Android.

Baik.. Jika anda sudah memahami istilah Hard Reset pada Smartphone Android, dan sudah paham apa yang menjadi resikonya. Mari sekarang kita lanjutkan langkah dalam melakukan Hard Reset pada Smartphone Android OPPO find muse r821 :


Langkah-langkah


  1. Matikan Smartphone OPPO find muse r821
    Hard Reset OPPO find muse r821
    Hard Reset OPPO find muse r821


  2. Kemudian Tekan dan tahan bersamaan Tom bol Volume Down+ tombol Power,

  3. Setelah muncul menu Recovery di layar, lepaskan tombol
  4. Kemudian muncul menu seperti gambar dibawah ini.
    Hard Reset OPPO find muse r821
    Hard Reset OPPO find muse r821
  5. Pilih English
  6. Selanjutnya akan muncul menu oppo recovery seperti gambar dibawah ini.
    Hard Reset OPPO find muse r8   21
    Hard Reset OPPO find muse r821

  7. Selanjutnya pilihlah menu "wipe data and cache" -> gunakan tombol volume untuk memilih-milih menu, dan tombol power untuk eksekusi pilihan.
    Hard Reset OPPO find muse r821
    Hard Reset OPPO find muse r821
  8. Sekarang pilihlah "yes" menggunakan tombol volume down dan eksekusilah menggunakan tombol power.
    Hard Reset OPPO find muse r821
    Hard Reset OPPO find muse r821
  9. Proses Wipe akan berjalan, Setelah itu tekan tombol power, untuk konfirmasi menu pilihlah tombol reboot.

    < /li>
Silahkan anda praktekan Cara Hard Reset OPPO find muse r821 diatas, semoga berhasil.


PERHATIAN... !!!
Hard Reset akan menghapus semua data dan akun
Penulis tidak bertanggung jawab pada resiko yang ditimbulkan sesudahnya.

How To Unlock Pattern On Xiaomi mi 3 without any tools.


 If you have forgotten you phone password or Pattern or you are unable to turn ON your phone than follow this few steps.


Step 1: Turn off your phone.

Step 2: Make sure that battery fully charge.


Step 3: Press and Hold together Volume up button + Power Button for several seconds to go to recovery mode.

Step 4: Now, Select  ENGLISH using Volume down key and  power key to confirm.


Step 5: Now, Select  WIPE AND RESET.


Step 6: Now, Select WIPE ALL DATA. (warning: your all phone data will be deleted)

Step 7: Now, wait few seconds to complete the process.

Step 8: Select Reboot System Now.

How Hard Reset Acer liquid E2.


Hard Reset Acer liquid E2. Todays We will explain to you how to perform hard reset on Acer liquid E2 smartphone. Some People say that Hard reset process is call with master reset or factory reset. Many people asking why shoud we perform hard reset to our phone. The logical answer that can I say for this asking is :
  • Because we will sell our Acer liquid E2 Android phones
  • We will give our Acer liquid E2 away to some one else, and we dont want that one know everything about our secret data, so we have to erase all data before back up it.
  • our Acer liquid E2 has been lagging and stuck on android logo, this call with bootloop
  • There are many bug on Acer liquid E2.
  • We want to remove all personal data and setting that wasstored in Acer liquid E2.device.
  • We have forgotten on PIN or Patern Lock at&nb sp;Acer liquid E2.
  • and many other reason.

1st Methode. Hard Reset ACER LIQUID E2 Using Menu :

  1. Turn on ACER LIQUID E2, by long press on power button
  2. Make sure your battery is fully charged, we recomended taht your battery has 80% power
  3. Always BackUp your importan t data that store in Acer liquid E2.
  4. Go to menu: Setting > Privacy > Factory Data Reset > Reset
  5. Choose Erase everything to confirm that you have ready to do master format or hard reset on Acer liquid E2.
  6. Acer liquid E2. will continoued to hard reset till it back for factory default.


2nd Methode. Hard Reset ACER LIQUID Z5 DUO (Z150) using Hardware Key.


  1. Turn Off your Acer liquid E2 Handheld first
  2. Make sure your battery is fully charged, we recomended taht your battery has 80% power
  3. Always BackUp your important data that store in Acer liquid E2
  4. Press and hold Power Button + Volume UP together, release it when phone vibrate.

  5. Then, You should release held keys when new Menu appears on the sccreen
  6. Choose Recovery Mode menu. Press Volume UP to scroll to Recovery option and confirm your choice by pressing Volume Down.
    recovery menu acer liquid E2
  7. Hold down the Volume Up and Power button for a short while to see the Recovery Mode menu.


  8. Choose Wipe data/factory reset menu. Press Volume Down to scroll to Recovery o ption and confirm your choice by pressing Power Button.
    Hard Reset Acer liquid E2
    Hard Reset Acer liquid E2
  9. Now, choose "yes" Press Volume Down to scroll to Recovery option and confirm your choice by pressing Power Button.
    Hard Reset Acer liquid E2
    Hard Reset Acer liquid E2
  10. Then press Power Button, to confirm menu and then choose  reboot system now
    Hard Reset Acer liquid E2
    Hard Reset Acer liquid E2
  11. Follow the screen instruction to continued hard reset your Acer liquid E2


Thats all, you have done to Hard Reset Acer liquid E2,

ATTENTION... !!!
Hard Reset/Master reset/Factory Reset may erase all data stored on internal memory and all accoount setting, We  is not responsible for the risks afterward. 
Do it with your own risk

Jumat, 29 Juli 2016

How Hard Reset Acer liquid S2.


Hard Reset Acer liquid S2. Todays We will explain to you how to perform hard reset on Acer liquid S2 smartphone. Some People say that Hard reset process is call with master reset or factory reset. Many people asking why shoud we perform hard reset to our phone. The logical answer that can I say for this asking is :
  • Because we will sell our Acer liquid S2 Android phones
  • We will give our Acer liquid S2 away to some one else, and we dont want that one know everything about our secret data, so we have to erase all data before back up it.
  • our Acer liquid S2 has been lagging and stuck on android logo, this call with bootloop
  • There are many bug on Acer liquid S2.
  • We want to remove all personal data and setting that wasstored in Acer liquid S2.device.
  • We have forgotten on PIN or Patern Lock at&nb sp;Acer liquid S2.
  • and many other reason.

1st Methode. Hard Reset ACER LIQUID S2 Using Menu :

  1. Turn on ACER LIQUID S2, by long press on power button
  2. Make sure your battery is fully charged, we recomended taht your battery has 80% power
  3. Always BackUp your importan t data that store in Acer liquid S2.
  4. Go to menu: Setting > Privacy > Factory Data Reset > Reset
  5. Choose Erase everything to confirm that you have ready to do master format or hard reset on Acer liquid S2.
  6. Acer liquid S2. will continoued to hard reset till it back for factory default.

2nd Methode. Hard Reset ACER LIQUID S2 using Hardware Key.


  1. Turn Off your Acer liquid S2 Handheld first
  2. Make sure your battery is fully charged, we recomended taht your battery has 80% power
  3. Always BackUp your important data that store in Acer liquid S2
  4. Press and hold Power Button + Volume Down together, release it when phone vibrate
  5. Then, You should release held keys when new Menu appears on the sccreen
  6. Choose Recovery Mode menu. Press Volume Down to scroll to Recovery option and confirm your choice by pressing Volume UP.
    recovery menu acer liquid S2
    recovery menu acer liquid S2
  7. Then, you will see Acer Logo appar on screen
    acer logo acer liquid S2
    acer logo acer liquid S2

  8. Choose Wipe data/factory reset menu. Press Volume Down and Volume UP to scroll to Recovery option and confirm your choice by pressing Power Button.
    Hard Reset Acer liquid S2
    Hard Reset Acer liquid S2
  9. Now, choose "yes" Press Volume Down to scroll to Recovery option and confirm your choice by pressing Power Button.
    Hard Reset Acer liquid S2
    Hard Reset Acer liquid S2
  10. Then press Power Button, to confirm menu and then choose  reboot system now.
    reboot acer liquid S2
  11. Follow the screen instruction to continued hard reset your Acer liquid S2


Thats a ll, you have done to Hard Reset Acer liquid S2,

ATTENTION... !!!
Hard Reset/Master reset/Factory Reset may erase all data stored on internal memory and all accoount setting, We  is not responsible for the risks afterward. 
Do it with your own risk

How to flash Xiaomi Mi 4i Stock ROM without using any flash tool.


Step 1:  Download Xiaomi Stock ROM on your phone from below link.


Step 2: Open Tools Folder from the Launcher and Select Updater like below image.


Step 3: Now, click on Menu Key on your Device and Select installation file.


Step 4: Locate the zip file that you have downloaded.

Step 5: Now, click on the update button to begin the update process.


Step 6: Now you will  see the update process.


Step 7: Once update process is completed, select reboot to finish.


DOWNLOAD:

                           Xiaomi Mi 1s Android  5.0 stock ROM
Acer Iconia Tab A1-810 user guide manual â€" Acer Iconia Tab A1-810 was released on May 2013 with low price and runs Android 4.2 Jelly Bean. Acer Iconia Tab A1-810 is thicker but there is options of expandable storage and Micro-HDMI port also available. Acer Iconia Tab A1-810 also called by Android fans as iPad Mini replacement but its very different although have a similar size in screen display.


Acer Iconia Tab A1-810 user guide manual


Acer Iconia Tab A1-810 equipped with specifications and key features such as: 208.7 x 145.7 x 11.1 mm in dimension with 410 g in weight, 7.9 inches LED backlit IPS LCD capacitive touchscreen display 16 million colors 1024 x 768 pixels screen resolution with multitouch support, microSD up to 32 GB, 16 GB internal storage, 1 GB of RAM, 5 megapixel rear facing camera with autofocus, VGA as front facing camera, run Android 4.2 Jelly Bean operating system, powered by 1.2 G Hz quad core processor MTK 8125, Li-Ion 4960 mAH battery non removable, stand-by time up to 350 hours and talk time up to 10 hours.  

Acer Iconia Tab A1-810 rivals and competitors manual:

  • Acer Iconia Tab B1-A71
  • Asus Memo Pad HD 7
  • Apple iPad Mini
  • Google Nexus 7
  • Samsung Galaxy Tab 2 7.0
  • Samsung Galaxy Tab 3 7.0

Acer Iconia Tab A1-810 user guide manual is available in pdf file format which contains of 53 pages and carry 3.5 MB in size. Acer Iconia Tab A1-810 user guide manual help owners to know more about the tablet in specifications chapter. On Acer Iconia Tab A1-810 user guide manual i advanced settings, owners can find wireless and network setting, updating operating system and reset the device.

Table of contents for Acer Iconia Tab A1-810 user guide manual:
  • Getting to know your tablet
  • Setting up
  • Using your tablet
  • Connecting devices to your tablet
  • Going online
  • Managing people and contacts
  • Advanced settings
  • FAQ and troubleshooting
  • Life image
  • Specifications
  • End user license agreement
For owner of Acer Iconia Tab A1-810, here we give you direct link download of Acer Iconia Tab A1-810 user guide manual from official Acer website below:

Download Acer Iconia Tab A1-810 user guide manual here

Kamis, 28 Juli 2016


Here i am going to show you how to access the internal function of galaxy S5 for testing the various hardware parts of your phone if it is working properly or not with the help of this secret code you can test lcd, vibration, camera, sensor (accelerometer sensor, proximity sensor, magnetic sensor), touch screen, speaker, sub key, etc... if you have any hardware problem with your galaxy S5 you can identify with this code if it is working or not to do this follow the steps below.
First of all open your keypad


Then dial the secret code *#0*#. Now you get a screen with title LCD TEST and below that you have lots of option to test various hardware parts of your phone such as speaker, sensor, lcd, etc
To go back use right physical button
while testing the touch you have to touch and mark all the squares back button does not work
Other use full secret codes for android phone tested on galaxy S5


  • * #1234# to check software version of phone.
  • *#12580*369# to check software and hardware information.
  • *#0228# Battery status (ADC, RSSI reading)
  • *#32489# Service mode
  • *#7780# factory data reset galaxy S5
  • *2767*3855# Full factory reset (Dont dial it does not ask you to confirm unless you have problem)
If factory reset codes are not working t hen Click Here 

Download Best Motion Sensor games for Andorid

 Click Here To See Samsung Galaxy S4 Mini And Zoom

These codes will work on all the models of galaxy series.
Photo iPad Mini Appeared in Site Vietnam Or Image iPad Mini - Apple is due to be formally introduced iPad Mini on October 23, 2012, some of you must be curious about the design of this latest iPad Mini. And this latest leak may be the answer.
VnExpress a site that comes from Vietnam, has just posted recent photos of the iPad mini. According to this source the iPad mini will come with size 7.85-inch touch screen with a 4:3 aspect ratio, and is also equipped with two speakers at the bottom. iPad Mini also has used the latest Lightning connector as the iPhone 5.
Leaked image is only a prototype, so Apple may still be changing some parts, but at least we have a shadow about the size of a mini iPad.

For now we can only wait until next week.

Apple rumored to be launching iPad Mini in 12 versions, and iPad Mini has a starting price tag of U.S. $ 249

How To Root Xiaomi Mi 4 LTE Using Towel Root.


Root Xiaomi Mi 4 LTE. Todays We will share to you about how to perform root on android smartphone device. Now I will explain how to root on Xiaomi Mi 4 LTE. this device comes with Android OS, v4.2 (Jelly Bean) and supported with Qualcomm MSM8928 Snapdragon 400 Quad-core 1.6 GHz Cortex-A7, GPU Adreno 305, 2 GB of RAM as their engine. Before we continued our experiment I will explain to you what is the meaning of root on android, additional feature is main camera with 13 MP a nd secondary camera 5 MP will give you good experience to take any picture.

Rooting is the process of allowing users of smartphones, tablets and other devices running the Android mobile operating system to attain privileged control (known as root access) over various Androids subsystems. One thing that should you know that rooting on your Xiaomi Mi 4 LTE may cause loss of warranty. You are only responsible for any further losses and damages caused to device. We will not be held liable in any circumstances.
Root Xiaomi Mi 4 LTE Using Towel Root.

But. There is very special thing for Xiaomi Mi 4 LTE when you have rooted. Xiaomi Mi 4 LTE will not loose your waranty like the other android device. But, there is disadvantage for Xiaomi Mi 4 LTE after rooted. Xiaomi Mi 4 LTE will never get OTA updates. Dont worry about it you can unroot this device again to back original state.

Guide Root Xiaomi Mi 4 LTE step by S tep.

Make sure to always take backup all your important data like music, video, SMS, document (see this guide) and other data to the other resource outside of Xiaomi Mi 4 LTE device, and make sure your battery is fully charged or at least there is 80% of power on it before you continoued to proceed.

  1. Make sure your device is Xiaomi Mi 4 LTE. because this guide is intended just for this device
  2. Download and Intall USB Driver (here)
  3. Download towel root here
  4. After you download it, please copy .apk file to your Xiaomi Mi 4 LTE device

  5. Then, go to Settings and tick Unknown Sources option under Settings Security. Or, you can activated it when you install towel root.
  6. Now, navigate to your .apk file in your memory, and install it. if you see security warning from google you can continoue it, and select i nstall.
  7. Root Xiaomi Mi 4 LTE Using Towel Root.
    Root Xiaomi Mi 4 LTE Using Towel Root.
    Root Xiaomi Mi 4 LTE Using Towel Root.
    Root Xiaomi Mi 4 LTE Using Towel Root.


  8. Now, run your Towlroot application o n your Xiaomi Mi 4 LTE device by press make it ra1n to root your phone.
    Root Xiaomi Mi 4 LTE Using Towel Root.
    Root Xiaomi Mi 4 LTE Using Towel Root.
  9. Wait your device on root process,  Xiaomi Mi 4 LTE will reboot automatically. When your device boot up, download SuperSU zip Google play store or Chainfire Here.
  10. Unzip that file, then open common folder and copy Superuser.apk to your phone
    Root Xiaomi Mi 4 LTE Using Towel Root.
    Root Xiaomi Mi 4 LTE Using Towel Root.
  11. Now install Superuser.apk, then open it and Update SuperSu Binary 

  12. Do it with your own risk

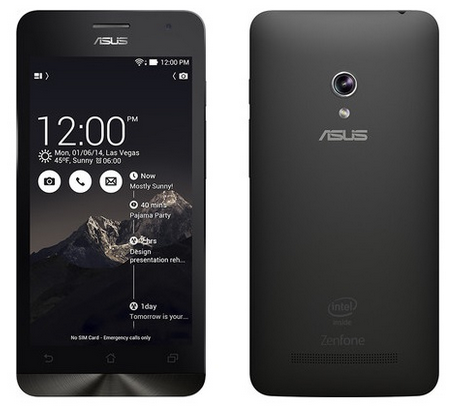
Asus Zenfone C Pc Suite and Usb Driver for Windows

Could you look for in a mobile Usb Drivers and Pc Suite, here provides a Usb Drivers and Pc Suite free download and how to install to Asus Zenfone C. Make sure you have the appropriate type of model phone before downloading the driver to the computer. Usb Drivers and Pc Suite support following type model for Asus Zenfone C Usb Driver, Pc Suite, Modem, Com port. Without delay, please download the following. Download Asus Zenfone C for Windows here Usb Driver and Pc Suite

Asus Zenfone C

Asus Zenfone C Pc Suite and Usb Driver InstallationTutorial :

  • You should know that if Asus Zenfone C smartphone is powered by a corresponding Mtk processor, here is explained how to install the Usb drivers and Pc Suite for the model of this type.
  • Run and use as an administrator if you are Asus Zenfone C Usb Driver and Pc Suite work very precisely and correctly.

Feel free to skip this step if the mobile device is not supported by Mtk Cpu :

    < li style="text-align: justify;">Enable Usb Driver Pc Suite debugging on Asus Zenfone C to do that, please go to Settings > Developer Options.
  1. Download the driver to the computers usb driver Extract files using WinZip or WinRAR, find the file "PdaNetA4150.exe" and start note (Be sure to close all programs). 
  2. Select the Type phone model (Asus Zenfone C Smartphone), Please select press / click the install button.
  3. Now you just connect Asus Zenfone C there will be a popup message saying your phone is connected. Congratulations you have completed the installation.
Well, thats a brief explanation neighbor how to download and step by step how to install Asus Zenfone C Usb Driver and Pc Suite for Windows, and uses his good luck.
Subscribe to RSS Feed Follow me on Twitter!